Backup your code
Have you ever heard about the saying Not your server, not your data or Cloud is someone else’s computer?
These sayings are there to remind everyone of the risks that can happen when you trust a service with all of your data. What happens if you put all of your family photos on Google Photos and your account is closed one day with a cryptic reason and you have no recourse? How will you get back your photos?
These situations have happened over and over.
If this can happen for your Google account, nothing prevents any of the services you are using to do the same to your account on their service.
People with a technical mindset have more and more moved over to self-hosted services, or at least keep a backup of their photos somewhere local (such as a NAS or a backup hard-drive).
What they don’t do though is keep a backup of their code.
Most programmers use GitHub as their main service to store their code. What if your GitHub account is blocked? Would you be able to get back your code? Maybe public repositories, but what about private repositories?
Enters Gitea⌗
Gitea is an open-source server that can mirror repositories from Github natively.
While Gitea is able to continuously pull the state of an already mirrored repository, it is not able to discover new repositories. This is why another tool is required: gitea-github-sync.
The setup is straightforward and can be done on a Raspberry Pi or any computer you have at home (it could even be your laptop or PC).
Setting up Gitea⌗
If you use docker, you can use the following docker-compose.yml file as your base:
docker-compose.yml
version: "3"
services:
    gitea:
        image: gitea/gitea:1.18.0
        environment:
            - USER_UID=1000
            - USER_GID=1000
        restart: always
        volumes:
            - ./gitea:/data
            - /etc/timezone:/etc/timezone:ro
            - /etc/localtime:/etc/localtime:ro
        ports:
            - "3000:3000"
            - "2222:22"
Also create the following file $HOME/.config/gitea-github-sync/config.yml.
$HOME/.config/gitea-github-sync/config.yml
gitea_api_url: http://gitea:3000/api/v1
gitea_token: <to-be-filled-later>
github_token: <to-be-filled-later>
Run gitea with the following command: docker-compose up -d
You can then connect to your Gitea instance on http://localhost:3000.
If you want to use Gitea for the sole purpose of backuping your GitHub account, the default values on the Initial Configuration page are good enough. If on the other hand, you want to use Gitea more actively, I would strongly suggest to have a look at their installation tutorial.
Now, you can go on http://localhost:3000/user/sign_up and register an account. The first account that is created is automatically escalated to admin.
After the account is created, you can generate a token to access Gitea through its API.
Go to http://localhost:3000/user/settings/applications and generate a new token. You can give it a name such as gitea-github-sync.
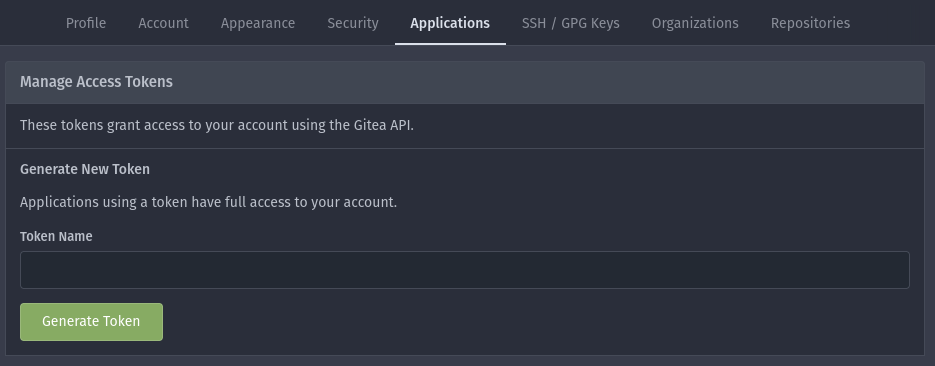
Once the token is generated, set the value next to the field gitea_token in the $HOME/.config/gitea-github-sync/config.yml file.
Generating a Github token⌗
GitHub now proposes two different ways of creating a PAT (Personal Access Token). The new way allows you to select which repos can be affected by the token as well as with which permissions. These new tokens must be given an expiration time and they must expire at least after 90 days.
The way Gitea works is that once a repository is mirrored, it will need to continuously pull the new changes using the same token. Gitea does not provide a way to update the repository access token through the API as of now, therefore a token with no expiration is required.
GitHub still proposes the “classic” way of creating tokens which can be set to never expire. Unfortunately, there is no way to limit to which repositories the application using the token has access to.
You can go to https://github.com/settings/tokens/new to generate a new “classic” token. Don’t forget to set the following values for your token:
- Note: you can set gitea-github-sync to remind yourself about how this token is used
- Expiration: no expiration
- Scopes: repo
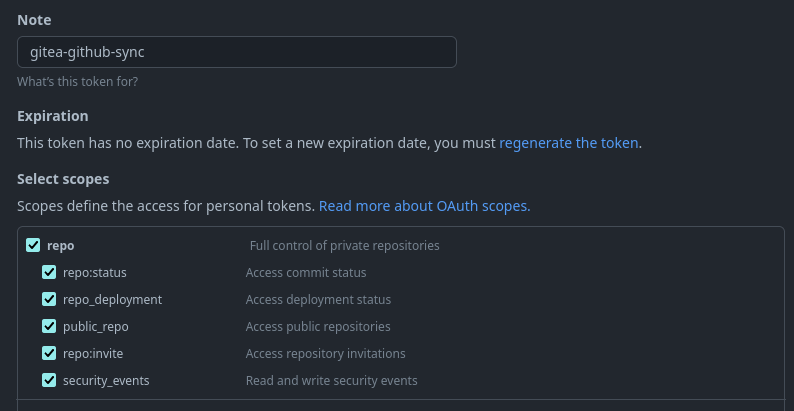
Once the token is generated, copy and paste it next to the field github_token in the $HOME/.config/gitea-github-sync/config.yml file.
Start Gitea and gitea-github-sync⌗
Now that you have Gitea and gitea-github-sync setup, it’s time to let it all run together.
Gitea should already be running in the background. gitea-github-sync requires to be executed regularly. One way to do it is through cron.
Run crontab -e to open your cron configuration file (if crontab does not exist, lookup how to install it for your operating system).
Once the crontab file is opened, add the following line at the end:
0 12 * * * docker run --rm -v $HOME/.config/gitea-github-sync/config.yml:/home/python-user/.config/gitea-github-sync/config.yml muscaw/gitea-github-sync:latest sync
The crontab above executes the gitea-github-sync script every day at twelve (local time of your computer).
If you are unfamiliar with the syntax for crontab, the website crontab guru is a really great help to understand what a crontab line does.
Be sure to execute the docker run command outside of cron in order to see if gitea-github-sync has any issue connecting to either Gitea or GitHub.
Conclusion⌗
With Gitea and gitea-github-sync setup, you now have a backup of the code you have on GitHub.
I don’t plan to move away from GitHub given that the service is great, but knowing that my code is safe in another location is good for the peace of mind.